Yearly Archives: 2016

Wiring

Visit 3rd August

Before we cruised away from handy train stations we arranged to visit Sheffield to see how things were progressing and see if there were any questions that it would be easier to answer on site.

The carpenters hadn’t been told that we’d be around but were happy for us to go on board before Ricky and Louis joined us. It looked like virtually all the wiring had been put in and most of the engineered oak flooring was down. Most of the cupboards were off the boat stacked up in the workshop. Most have now had the satin lacquer applied to them where they will be seen. I’m very used to seeing things in this state as it’s far easier to apply finishes when things are in pieces.

All of our bedroom was stacked up with a couple of drawers that will go in the cupboards for socks etc. You can see on the side of the bow steps that the top surface has had lacquer applied but not the sides as these butt up to cupboards.

Holes have been drilled in the cabin at the bow for the navigation lights and cables were showing on the starboard side.

The insides of the hatch have been clad now with oak. The insides of the steel doors have also been painted to match the stripes on the exterior. A nice touch, except the red stripe still needs to be addressed.

The rear cupboard and bike slot were in position inside Oleanna and I checked the measurements of them. Our bikes would fit, but only just at a squeeze. A hiccup in translation, they normally work to overall outside dimensions of cupboards. Luckily we’d spotted this now rather than when all the appliances were in place. Having a very close look at our bikes we can move the saddle slightly which should give us back some tolerance in the rear cupboard. The slot will be altered to give us a bit more height.

Wiring hung from the ceiling everywhere, coiled up ready for back boxes, fittings, switches and sockets. The cabin sides were half in place, some had been removed to start cutting the window openings in them.

The insides of the food drawers can be seen just next to Mick. They still need drawer fronts adding to them.

The ceiling in most of the boat is still unclad, but in the bedroom (sadly didn’t get a photo) it is up with holes for the lights already cut.

All the cables run back to the starboard side rear cupboard which will be the electrics cupboard. Here coils of many colours hung all labelled.

The thick blue cable is the 240 volt ring main and the grey coil is Cat 5 that we will have running to the TV and dinette area. The others well I have no idea!

This is the corner of the saloon by the bathroom. A hole has been cut for a double socket below the gunnel, the blue ring main is looped through it.

A section of the engineered oak floor is visible, most of it is covered for protection with cardboard. There is a section of floor that is just plain ply, this is where the sofa will sit. Most areas where cupboards, beds etc cover are done this way as they will never be seen. However if there is enough of the flooring left over this is an area that may get seen as the sofa is a stand alone sofa bed which may in years to come be replaced, revealing the floor.

In the bathroom the plumber has started. The hole in the floor is for the drain from the shower. A cross member of steelwork has had a section removed to help with this. Pipes for hot and cold water come up from below the floor.

The composting toilet and urine tank are on order along with the sink and taps for the bathroom.

The panel that the shower is fixed to is not in it’s final position in this photo. Fixing it all together whilst the panel is loose makes it a lot easier to reach the back. The two copper pipes protruding will be for the hot and cold water. On our old share boat at one time the tap and temperature control in the shower were very smooth, which made it almost impossible to turn off when you have wet hands. We checked that our tap has some grooves on it.

Discussions about positions of sockets on the dinette were had, as the dinette seating has had to be raised slightly to house the freezer this means there is no space above the cushions for sockets. So all power will go on the end of the dinette along with the Cat 5 sockets.

We have now had a price for Lithium batteries given to us, which we are really interested in as we shouldn’t have to replace them for about ten years, maybe more. Before we go ahead with it we need to know a little more regarding the charging voltage of the alternator and means of connecting the solar panel either via a dedicated MPPT controller or directly into the inverter/charger. We have also asked if space can be left by the battery bank, so that if we discover that we are running out of power in the first few months then we would be able to add an extra battery wired in parallel. We hope this is unlikely, but we’d feel happier to have the option available to us.

Although little was in place we were happy with the progress that is being made.

Carcasses and Electrics

Meeting 21st July

Most of the chaps at the yard had been on a weeks holiday somewhere hot. This either meant that not much progress would have happened since we were last there or a lot would have happened. It was the latter.

First we had a catch up on the battery front, more conversations had been had with the Lithium Battery people and Mick and I had put together a power audit. The audit was based on a winters high usage day. Without running the engine we reckoned we’d use about 82 Amp hours of power. The suggested batteries may be enough as it would be unlikely for us to not run the engine on such a day. Ken and Ricky will put together the prices so that we can decide if we can afford the greater initial outlay.

More fabric samples had arrived and luckily there was one that stood out from the rest for the dinette covers. This and others were taken down to Oleanna to see what they would look like in situ.

A lot had happened since our last visit, although everything was just placed in position for us to see as the floor is still to be laid and the ceiling will go in shortly. It’s most probably best if I talk through photos from the stern.

Carcasses have been made up for the cupboards at the stern. From the furthest back on the starboard side working forwards. The electrics cupboard above a cupboard which is challenged by the swim of the hull, this will be for deep storage. The cupboard door for the electrics cupboard will open above the rear steps.

The next unit will mainly be drawers. Our current boat has drawers that are high enough to hold a bag of flour, so we have two such drawers, a cutlery drawer, T towel drawer then a deeper drawer at the bottom and a cupboard filling what space there is left at the top.

Next will be an undercounter pull out larder unit. Next to that will be a slimline dishwasher.

This is the port side. A long cupboard with hanging space accessible from above the steps. The base of this will be where we keep our second folding bike, which comes out on rare occasions.

The top of this unit will have an open shelf so if/when the heavens open we can pop things there that we want to keep dry. There will be a shelf in the cupboard for the tool kit.

The stern steps are half steps or loft steps. We have these on on NB Lillyanne and really like them as they take up less space but don’t feel as steep as normal treads would. They have however been made with the leading step the opposite way round to our current configuration, so we shall have to be careful for a while. Our standard “Go in backwards, right foot first” will have to change.

Next to the tall cupboard is where there will be a slot left for our other folding bike. This will sit above a cupboard or drawer lifting it as high as possible under the worktop. This is so that the bike can nestle as close to the swim as possible without sticking out too much. We wanted the bike to be in a handy position. Following on from this will be the fridge, then the cooker, then some angled shelves.

Following on from the dishwasher will be the sink unit with the drainer going into the corner. The triangular cupboard will house crockery etc. This will be able to slide along the half bulkhead behind it so that you can get access into the cupboard in the corner.

I’m hoping that the corner cupboard will have a couple of pull out shelves/ drawers to make access even easier.

All these units are on feet and there will be a plinth below.

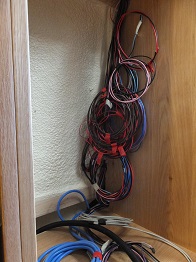
The cabin sides have been clad with painted birch ply and framed simply with oak. The ceiling has yet to be clad in a similar way. This can only be done when the electrics have been routed to where they need to be.

Between each panel is a joining strip which covers the join, this also allows there to be a small gap for expansion and contraction of the cabin sides. It has a simple detail of a grove down it. Other boats we’d seen in fit out had much more detailed panelling, but I preferred it to be simpler.

Below the painted panels, where visible, it will be clad in plain oak faced ply.

The windows have yet to be cut into the wooden cabin panels. Everywhere apart from the bathroom the liners will be oak. In the bathroom we have gone for metal liners as this will be where the most condensation occurs, which can stain wood.

Here the glazed doors for the side hatch are shown. These sit inside and open inwards, outside the metal outer doors will close to protect these doors when it is raining and for security.

 At the end of the galley the half bulkhead has been made into a 6 inch wide cupboard. This is so that I can store a drawing board and model making equipment. Being here it will be hidden away, but easily accessible when needed. There will be a lid and door on it as my drawing board will need to slide up and out of it’s storage.

The L shaped dinette has mostly been put together.  On the corridor end of the seats is a drawer for a Waeco freezer. Behind the drawer there will be a storage space, only accessible if you remove the cushions.

Below the longer section of the dinette are two doors that open when pushed. This means we can access storage here without having to lift the cushions.

The front facia of the long side pulls out and the back of the seat flattens out to cover the storage below. The back cushion will then become part of the mattress for a double bed. This is such an easy way to make up the bed compared to what we have now.

The table will fold away and be stored under the gunnels opposite the end of the dinette.

At the end of the dinette is a small book case. This originally was going to have open shelves, but now we have a ships cat we need some easy access storage that she can’t access hence the door.

Next to this will be a 2.5 seat sofa with a shelf unit on the other side going into the corner with the bathroom bulkhead. A little bit was lost in translation with this unit as it needs to be open to the floor below to be able to store a pouffe that will extend the sofa into a single bed when pulled out.

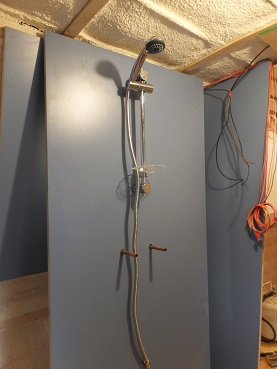
In the bathroom some of the blue laminate was in position around the quadrant shower tray.

In the opposite corner there is no floor as yet as this will be where our urine tank for the toilet will be. We did some research into calcification of urine, a steel tank would be fine unless you needed to clear any blockage. The best solution to this is to use some acid, which over time would eat away the steel, so we are having a plastic tank which won’t be affected by acid. Better safe than sorry in a few years time!

The tank would last Mick and myself about four days, although we’d empty it long before then. But it will give us capacity for when we have visitors, so that we won’t have to be emptying it every day.

Then the bedroom. The porthole opening has been cut away above the bed. Carcasses of the cupboards by the bow doors were in position along with cabin steps. These cupboards will mainly be shelved, but one will have some hanging space that goes down below the steps. Not much need these days for hanging long dresses. I suspect most of this cupboard will end up being used for folding chairs etc.

The opening facing away from the bow doors is where our vacuum cleaner will live.

On this side of the bed at floor level will be the washing machine. This is mirrored with a narrower cupboard on the other side of the bed. There is a ledge big enough for a mug and books on both sides too.

Three thin cupboards span the width of the bed above the porthole. These are likely to be used for bed linen.

 All the holes are ventilation under our mattress. This is the cross bed. The open section at the back will be for deep storage, winter clothes and duvets, maybe work things.

Under the holes are two large drawers at floor level, one each side of the bed, his and hers drawers.

The holey bit is two layers, the top one pulls over to span the boat to make a cross over bed. The mattress on this will have a hinged section that we fold over during the day and push the base back in to create a corridor.

 Looking out through the front doors the cratch wood work is complete. The well deck on Oleanna is higher than on NB Lillyanne, so we will have to stoop more when the cover is on out there. I suspect on fine days the cover will get rolled right back so that there is more head height.

Front doors looking rather fine with an inset of darker wood in the bottom panel.

The lock looks good and has two more keys than our current front door has. Although when we returned to the boat later the doors and surround had been removed. I suspect they will stay like this for a while to make it easier to get things in and out of the boat.

The front doors in situ with the cratch in position.

After discussing various things inside we sat down to discuss the electrics.

Two meetings ago I had produced our plan for lights, switches and power sockets. This was our suggestion based on how we live currently. Last time we had visited positions of switches was discussed, but there wasn’t enough time to go through everything. Today it had to be done, otherwise it would start to hold everything up. One or two reductions in the number of light fittings, but mostly it is how I had drawn it. Positions for switches and Cat 5 sockets were discussed. With some hunting on the internet I have since found some chrome Cat 5 covers so they won’t look too out of place.

Confirmation of appliances is needed soon. Very sadly the cooker we were wanting will not be possible. We had chosen a 600 deep cooker with a lid, but forgotten that positioning it on the side of the boat would not work due to the gunnels. So we have a mission to find a cooker without a lid that will fit our needs and position. If this had been pointed out earlier the galley would have been designed differently. A similar cooker to our current one is not on our cards as we haven’t had Yorkshire puddings for two years and I dream of having them again with a Sunday Roast.

Version P

Putting the drawings round the right way and nudging the washing machine should have been an easy thing. But on the originals I hadn’t added any tolerances for appliances, this meant everything was getting very tight. Julia had suggested looking for a narrower washing machine to bring the bedroom/bathroom bulkhead back to where it should be.

Looking through machines took time and then the conclusion that there isn’t a smaller washer/dryer available than the one we’d already chosen. What else could give cupboard wise. Not much as when you come in through the front doors you need to be able to stand somewhere.
In the end we had two choices.
1 only have a washing machine not a washer / dryer.
2  reduce the size of our bed from 5ft to 4ft 6″

We have lived with a 4ft 6inch wide bed for the last two years tucked under the gunnels, so as a cross bed it wouldn’t actually give us more mattress, but more space to one side. Living without the option to be able to dry clothes in the winter wasn’t good. So after chatting it through for a while we were both happy to go for a narrower mattress.

Since doing the original set of drawings we had changed our mind about which fridge we’d want. The new one is that bit narrower than the original, this meant one side of the galley could have more tolerance for our folding bike storage.

We put together a long list of important drawer and cupboard measurements, scanned the drawings and emailed them off before Kris in Sheffield started work on Monday morning. This had taken most of a weekend. Just a shame that we put some measurements of depth in the height column! Ricky raised a question about our galley cupboards which made me realise our mistake. An amended list was put together and resent.

Whilst I was busy drawing, Mick was researching Lithium Batteries. Thank you Adam for your comment.

Panel dimensions and ballast

Meeting 1st July

We were called back to Sheffield earlier than we thought we would be, various questions had arisen since last Thursday and it made sense for us to meet face to face. So we caught the train from Saxilby for a morning meeting.

Ken, Julia and Ricky were on hand to chat things through. Lots of research had been done over the week and one decision was needed asap. We had been wanting to have an Alde 3020 gas boiler along with a Bubble Stove with a back boiler.  Our heating needs tend to be mainly covered by our solid fuel stove in the winter and we were wanting to be able to harness some of this energy to heat our bedroom. The Alde boiler would mainly be used to help take the edge off on spring and autumn evenings, or first thing. Ricky had chatted combining both systems through with the main man at Bubble and several engineers at Alde.

The overall consensus was yes it was possible, but very complicated, much better not to bother. The Bubble chap went into details of a system with gradually rising pipes (these would all have to be hidden behind the cabin sides), thermal storage to help bleed off the heat, pumps as you can’t have the boiler boiling in the stove. The Alde engineers at first were positive, then with more digging and another two conversations with engineers who understood the scenario it got more complicated. A special calorifier would be needed with four coils, one for the Alde boiler, 1 for the back boiler, 1 from the engine and 1 for the radiators, avoiding copper in the system too. All sorts of details were talked about, yes they could do what we’d asked but it would be another extra onto our budget. We needed to talk it over between us and give a decision before the end of the day as this would effect things next week.

Conversations turned to the urine tank below the floor. As space on Oleanna is tight this has to be below the floor, which would make it hard to lift out to empty. Ken a while ago had suggested having a larger tank with a built in pump to empty it which now seems like a good idea. We had asked for a manual back up should the pump fail. They would provide us with a second outlet on the gunnel which we’d be able to lower a hose from a hand pump. This all works for us.

Then the upgrading of the alternator and batteries was discussed instead of having travel power. Ken had been looking into Lithium Ion Batteries which work in a different way to wet cell ones.
Mick here:
In order to save a few thousand pounds we had decided not to have the Electrolux Travel Power system installed but instead spend a few hundred on an upgraded  24v 100 amp leisure alternator. On chatting to Ken about this he suggested looking at having Lithium ion batteries in the leisure bank instead of the usual lead acid bank. On paper this sounds like a good idea. Lithium batteries can be run down to over 80% discharged without causing damage to them unlike to maximum 50% of a lead acid. Lithiums also charge back to full charge much more quickly than lead acid. The other main benefit is that the life of them is up to 10 times longer than a lead acid. Of course the downside is the price, they are MUCH more expensive but because of their longevity they should work out cheaper over an expected 10 year life span. Trouble is we would have to pay now instead of over 10 years!
If we went for these then we would need a different MPPT controller for our solar panels, a much more expensive one, but Ricky was waiting to hear back from Victron to see if their inverter/charger could also double as a solar panel controller. They have also asked Beta whether the 100 amp alternator can be configured to output the slightly higher voltage that the lithiums need to charge.
We need to think about this more. Any comments from blog readers?

The problem with the positioning of the freezer has been overcome and it will be possible to have it in the dinette on runners.

In our galley we will have a stack of drawers. The original thought was to have Shaker fronts to cupboards and doors, but I am not so sure of this now because of the 5 drawers one above the other. A couple of other possibilities were talked about, so some more thought is needed there from us.

In our last meeting we had provided a plan of how we saw the lights and sockets working, we chatted them through with Ricky. We may have over done what we need, so they are going to come back to us with what they would suggest. Although I’m sure not many boaters need extra lighting over their dinette for model making. We’ll see what they come up with. The position of switches was also discussed, a look around the almost finished boat in the yard illustrated where would be good places for them.

We then headed to chat things over on board. The engine bay has been dried out and given a coat of immaculate white paint, not sure how long it’ll stay that way once we get hold of her!

Still in the engine bay water pipes for the heating have been slotted through into the cabin through the tubes. These are just visible in the picture above.

The other side of the bulk head and the pipes run down and into the bilge.


Here they run along a layer of ballast and across the cross members. Joists have now been added to these cross members and another layer of ballast added where needed.

There are gaps in the ballast. The above photo is where the bathroom will be. I think the two dark lines on the side indicate which cross members will need to be altered to accommodate the urine tank. One layer of ballast has been left clear towards the bow as this will be where our cupboards and bed will be, giving this side more weight.
The pipework on the starboard side is for water. One pipe heads to where the water tank will be, the other stopping short at the washing machine. On the port side the four pipes reduce in number once past the solid fuel stove.

Chris the carpenter joined us to discuss the positioning of panels on the cabin sides. These want to look considered, but with the positions of windows not identical on each side the panels will be different slightly. Also as I have more full height cupboards on one side this will also affect the look. But a solution was come up with that should look good.

“How big is the bathroom?” isn’t really the question you want to hear as people are clutching plans in their hands. But as they are still using the plans that I scanned back to front (on purpose) it is no wonder. Our bed which should be 1.5m wide had been read as 1.2m and this made our bathroom vast! It was then discovered that with the end bulk heads, my forgetting to add a bit of tolerance and a side panel to the washing machine the shower cubicle was getting very close to the bathroom porthole. An amendment was needed to rectify this.

I said we’d look at it and possibly a smaller washing machine as I re-drew the plans at the weekend. It had been worrying me that they were still using back to front plans which I could with some time rectify.

On the workshop floor was a large pile of oak slices along with some other darker wood on top. These will be used for the frame work of the panels. When we’d visited back in January we’d been shown a boat that had two different painted panels, oak and birch. The oak shows it’s grain where as the birch is less obvious. I preferred the birch so a sample will be put together for me to have a look at next time.

The plank and pole rack were obvious on the other boat, last time we were here we’d noticed that we had nothing on the roof, but a chrome version will be added to Oleanna at a much later date.

After our meeting we headed to the canal basin for some lunch, a fish finger sandwich and to discuss heating. We were both of the same opinion that spending the extra money and time to get a back boiler to work with the Alde boiler was not going to be worth it. We have survived two winters on board NB Lillyanne without a back boiler and we already know that Oleanna is better insulated. A shame not to be pushing the free heat from the solid fuel stove around, but we still have to think of the pounds. Our decision was emailed through to Julia and Ricky and I suspect the extra pipes for the back boiler were removed that afternoon.

Paintwork and insulation

Shortly after Crick Boat Show I emailed our idea of the paintwork over to Finesse in Sheffield and paint colours were confirmed. Sadly the shade of blue that we’d been wanting couldn’t be mixed as a two pack paint, it is only available as an oil based paint. So the next best blue was chosen. I had asked to be able to chat through what I wanted with the painter as a design on a sheet of A4 is not the same as looking at the side of a hull.

Model
When we’d been trying to find the right colour blue we’d made note of several boats with it, one of these was a boat that Ken and Julia had built at Fernwood several years ago. The lines on the cabin sides were similar but not the same as my design. Somehow my request of a visit was lost in translation and lines were painted on the hull in a similar manner to the Fernwood boat . First we knew of it was when a couple of photographs were sent through. The positioning was good, the size right, but both lines on the cabin sides should have been the same, not a mirror image of each other. So the bottom line has a shadow above it, which is not what I’d wanted and I’d not had chance to explain the design to anyone. 

Model Sign writing
I’m sure they’d been expecting me to say that the paintwork looked wonderful and were surprised at my reaction. Apologies came back and our next meeting was arranged quickly.

Model Galley
Our cruising plans on NB Lillyanne were being disrupted by the River Trent going into flood, so we decided to sit out the high levels in Nottingham. I made use of this time to colour up the 1:25 scale model I’d made. With the exterior completed I then moved on to the interior, until everything had suggestions of colours on them. My hope is that this will help as a visual reference to the builders and ourselves just as a model is used in producing a play.


Meeting 23rd June.
Bathroom finishes
More samples had arrived with Julia, both fabric and laminate for the bathroom. The right shade of blue laminate fitted in nicely with the Kardean sample I’d shortlisted for the bathroom floor, A laminate for the ceiling was chosen too, a warm shade of cream.
The layout of the galley was discussed and notes taken on dimensions of cupboards and drawers that are important to us. My homework is to provide a comprehensive list of dimensions through the boat. My original drawings had quite a lot of information on them, more would have made them hard to read, but now specifics are needed, so the drawing equipment will be taking over the dinette table again.
Oleanna had moved into the fit out workshop and was sitting there on her own, suspect another boat will join her at some point. A look at the paintwork with lots of explanations as to the positioning of lines, the dimensions of them etc. This was all fine, I had no problems with any of this. But sadly my opinion still hadn’t changed on the bottom line, it still had the shadow on the wrong side of it. My design is as if the light source is coming from above the front of the boat, so the shadows are below and to the rear of lines and sign writing. These things matter to me, I can trompe l’oeil intricate architectural details on theatre scenery, so a shadow in the wrong place will just annoy me for years.
Tunnel Bands at the stern in the same cream and red
Grab rail red, roof cream

Bow to stay blue but change to Epiphanes Multiforte at the cratch board for ease of touching up the gunnels
Every layer of paint has a thickness to it so any alteration has to be considered carefully so as not to show up in the shine on the cabin side. The line and shadow need to be in the same position just the other way up, so there is a chance that they can mask off the existing paintwork and repaint it. We are waiting to see what the painter thinks and if there is any other solution.
Roof cross members covered in timber

Everything spray foamed apart from the floor and Mick!
Looking to the stern
Now that Paintgate was dealt with we climbed inside to see what had been happening. The cabin sides and below the well deck were all spray foamed. This is a foam that when sprayed expands and then hardens, you can get it in a spray can for filling holes in walls. The foam is the boats insulation and protects the interior of the steel shell from condensation.
Covered window

Timber had been added to the metal supports on the shell, these are to fix the cabin linings to. All the windows had been covered with panels of wood which were being removed and excess foam was being cut away. The letter box hole at the rear (ventilation) was full of foam and was invisible.
Pipes are for waste water from sinks, washing machine etc
The floor/bilge is left unsprayed, this will soon have paving slab ballast added in between the cross members. Anything that requires extra depth needed to be agreed on today so that any modifications could be made to the structure before the ballast is added. We are going to have a urine tank under the floor for our composting toilet so some modifications to accommodate it’s position may be needed.
Large conduit to run under the floor for water pipes
On top of the cross members on the base, joists will be added for the floor to be laid on. On most boats the water pipes run in boxing along the cabin floor at the sides, we however will have ours running below in a large conduit, which will have access points at any joints in the pipework. This will mean that our floor extends to the cabin sides and as our shell is a Birmingham square no tricky angles will get in the way of cupboards or sofas.
Electrics will go in the black conduit in the corner
Up at ceiling level another conduit has been run in the foam for power cables.
Under the well deck where the water tank will go

What is this?
The space under the well deck is where the water tank will be. On the underside of the well deck was a metal loop, if anyone knows what it is please let us know, Ken didn’t know either. We suspect it is left from the fabrication from the hull and will be ground off when the water tank is fitted.
Water tight engine bay

Climbing up onto the stern we noticed a nice detail in the anti slip. Subtle but still visible. Inside the engine bay we already seem to have water! This will be from when she has been stood outside, good thing is that it hasn’t drained away meaning it is water tight. Next time we visit I’ll have to measure how wide the openings to the stern lockers are to see if a normal bucket will fit.

Stern Locker
Anti slip on the roof
The roof has been anti slipped and the masking is where the mushroom vent holes are in the ceiling. We are not sure where the semi-flexible solar panel is planned to be fixed as yet as there was no obvious space left without anti slip.
Standing on the weed hatch

View from the stern to bow
A sneak look on board a boat that is almost complete to look at the flooring. It was a Kardean tile wood effect, fine if you like that sort of thing, but we’d rather real wood. This boat has been built for a very tall chap and the interior height is vast. The cabin sides have been built deeper to accommodate this.
Back on the engineering side of Oleanna, we were given details and some choices on boilers, alternators etc.
Engine bay with hull identification numbers

Stern locker 
Heating wise our ideal is to have a Bubble corner stove with back boiler, which would heat the boat radiators for much of the winter. Back up would come from an Alde 3020 boiler which runs off LPG. The advantage of this boiler is that it will also work from mains electricity when hooked up. However as the boiler has an aluminium coil you can’t have copper in the system. Mixing the two heating methods to the radiators is also complicated and may end up costing a lot. Finesse would normally fit an Eberspacher boiler as standard which is another option cutting out the copper problem. But it may be that finances dictate that we can’t have a back boiler on the stove. Now that Ricky understands how we see ourselves keeping warm he can chat to an engineer about the options and come back to us.
Domestic alternator upgrades were discussed. The standard one would be 60 amp, but we could upgrade it to 80 amp or go to 100 amp which is over three times as much money extra. Our current boat NB Lillyanne has a shoreline at the stern and bow, which we have found is very useful so the extra money is worth it.
Gas Locker
Different options for the urine tank were discussed and possible adjustments to the cross members in the boats structure to accommodate a larger tank. Currently we are looking at a stainless steel tank under the floor with a built in whale pump so we can empty it into another container for disposal. We would also want a way of manually pumping the tank out should anything go wrong.
The bow thruster has also been priced up. 10 HP Vetus with two batteries fed on a split charge system.
We have become used to sneaking up on fishermen and being able to talk to each other rather than shouting, so a hospital silencer is also on the list.
Looking out onto the well deck
The problem of the freezer and where to put it was discussed. Originally we wanted it under the dinette seating, but the height of the freezer was an issue. We have been trying to think where else it could go, the only other option was under our bed, but I have difficulty sleeping with ticking clocks let alone freezers turning on and off, so this we ruled out. An adjustment of how they build the dinette seating and maybe an extra 10 mm of height should accommodate the freezer.
We left with various decisions to make on the extras, a paint colour to find to match the bathroom ceiling, drawer and cupboard dimensions to collate. 

Crick Boat Show

Crick Boat Show has become a social event for us over the years. We spend most of the first day just saying hello to people we haven’t seen for a while. This year we also wanted to check out various things for Oleanna, having a lot of companies in one place takes a lot of miles travelling out of the equation.

Finesse Boats Limited
Last year we approached Tyler Wilson to build and fit out Oleanna for us. They had recently started fitting out boats, using the skills of Louis and Ricky (son and son in law of Jonathan). On our last meeting in Sheffield we were informed that Louis and Ricky were taking over the fit-out side of things under the name of Finesse Boats. We had a choice whether Oleanna would be one of the last Tyler Wilson Boats or one of the first Finesse Boats. The only difference would be in the boat builder name as the same people would be working on it either way and in the same workshops etc. The contract we’d discussed with Julia would also remain the same.
Quoting from their handbill
A newly formed collaboration of the finest boat builders in the industry. From paint to upholstery, steel to joinery, everything is contained on one site.

Finesse were being launched at the show, so we went along to say hello and see if any progress had happened on our build.

Ricky showed us a couple of photos of Oleanna in the paintshop. A photo can be seen on their facebook page. She was being sanded down after primer and undercoat. Next week they would start on the top coats. Once another boat is complete there will be room for Oleanna to move across and the fitout commence.
During the show we popped back to see them, asking dimensions of a couple of things and pointed them in the direction of a few stands that were relevant to our build.

Toilet Revolution
There were actually three stands at the show with composting toilets. One was purely for the Airhead, another was Ecotoilets (who we spent most of last winter trying to get in touch with to no avail). So we went to chat with Patrick from Toilet Revolution. On his stand was a Sun-Mar which was very impressive as the whole composting process takes place in the toilet. It is just a shame that the unit is so huge, it even needs a step to enable you to sit on the throne. He was very informative and sent us a link for plastic urine tanks which we would need. Oleanna will be a 24volt boat and the Separett Villa only comes as 12 volt. So either we will need to step the voltage down to 12 volts or fit a 24 volt fan.
Ricky popped along to see Patrick as he hasn’t fitted a composting toilet yet. Very handy to get both of them together and Ricky see the real thing.

Sofa Bed Barn
Michael at Sofa Bed Barn made us a sofa bed a couple of years ago for Lillyanne. We have been very happy with it, but sadly it won’t fit onto Oleanna as the layout is different. I had been in touch prior to the show to see if he would be able to make us a sofa that would also work as an occasional single bed with storage underneath.
Last year on his stand he had a new model sofa ‘Dalton’. This is a two seat sofa which pulls out and has a pouffe that adds to the end and would give you a four foot bed across your boat. This year he had brought a new version without arms. We chatted through at length what he’d be able to do for us and it looks like we have a solution. The Dalton without arms can be made to different dimensions as can the pouffe. So we can have a 2.5 seater sofa with a 2 ft square pouffe that can be pushed out of the way most of the time, but is the right size to make the sofa into a single bed when needed. Heights of the storage box below could be altered if we wanted it deeper, as can the overall height of the back. Once the fit out of Oleanna is progessing I’ll be able to get accurate measurements for height and the finished length. Then a decision on upholstery, whether to match the dinette or be different?
In the end we will have a bespoke sofa but based on a standard sofa, so hopefully not costing us an arm and leg.

Cratch and Pram Covers
We saw four companies about covers. Wilsons of Kinver, Kinver Canopies, Titan Boat Canopies and Canvasman. The prices that we were given as estimates ranged from £2000 to nearly £3000 plus vat. Ideally we’d like Dark Blue Acrylic covers with windows, which are backed in a paler colour, so that when all closed up it is still light in there. Some people think that the acrylic goes green in time, where as PVC doesn’t. But as I’ve found a scrub with some techwash gets ride of it and the canvas look is one that we prefer.

Freezers
Our original plan was to have a pull out freezer under the dinette seating as our shareboat did. But  height of the seat would be an issue for most freezers. The height we have to work with is around 1 ft. No-one at the show had one that low, even with the condensor at the back (Waeco) they are still too high. So we may need to rethink where it can go.

Crane or Boat Mover
Tuckey’s was there as they lift all the widebeams into the marina for the show. Mick had been introduced to Barry, so we went to chat with them about the price of transport and cranage to launch Oleanna at Crick.
The harbour master has said that he would find us two moorings side by side for a couple of weeks so that we could move from one boat to the other with ease. Then once Lillyanne was empty and had a thorough clean we’d put her on the market, possibly with ABNB or Rugby Boats.
Another option that we have is that Oleanna is launched in Sheffield, we move on board there and then move Lillyanne by water back south to sell. We could either do this ourselves or hire a boat mover to do it for us, this option is likely to be cheaper than Tuckey’s.

Solar Panels
There were some solar panels that received a good review in Waterways World a few months back. They are sold by Photonic Universe in Kent and they had a stall at the show. We will go for a 250 watt semi-flexible panel which seems to be the most powerful single semi-flexible panel available. We will have a 20 amp MPPT controler. This will enable us to fit another 250 watt panel if we find that one isn’t doing enough battery charging. We checked with the technical bod on the stall that a 20 amp controller can handle 500 watts at 24 volts. He confirmed that Mick’s technical training back in the 1970’s hadn’t been wasted and that W = V x I is still valid 40 years later!

Selling Lillyanne
When the time comes to sell Lillyanne we obviously want the best price for her. We can try selling her privately with an advert on apollo duck or go through a brokerage. Whilst still in Crick after the show we paid ABNB a visit. Lillyanne was bought through ABNB two years ago and they offer a 10% discount to previous customers. Her details were still on the computer from when we purchased her, so a few adjustments to the things that we have done and a new value was worked out. This was a nice surprise as she is worth the same or even more than we paid for her two years ago. Their valuation would of course be dependant on an inspection.
We’ll also be approaching Rugby Boats nearer the time to see what their brokerage fees are compared to ABNB.

A busy show for us. Not many boats looked at, although we did have a walk through a 45ft boat for sale at £49,999.99. Everything was very basic inside and with no heating you would need to spend money straight away on it.

Contract and more research

Whilst we’ve been busy boating on the Thames our contract and schedules have been put together. These were emailed through to us on the 5th May. A couple of small amendments needed to be made so we called Julia and these were very quickly fixed and re-emailed.
The contract has had to be emailed as our address is only a contact one and it could take several weeks for post to be forwarded to us. Next was find someone to witness our signatures. However as soon as we were off the Thames we were wanting our cat to have some freedom when we moored up, this meant being away from other boaters especially dog owners.

But in the end we spotted a boat we’ve been playing leap frog with for several days in Banbury, so we pulled in and asked them and they obliged. Thank you! Now all we need is a post box!

Our first payment has also been made over the weekend, so the hull is now paid for.

Yesterday was a very wet day, so it was time to get our heads down on more research for the boat. There are still a few things to make final decisions on, which alternator, gas versus diesel central heating, how much more will plumbing a back boiler into the system be amongst others.

Some thought today went into where we would want sockets, lights, switches and charging points. The drawing equipment came out and a suggested plan was put together.
10 lighting circuits, 4 usb chargers, double sockets etc. We are also considering installing some CAT 5 cable so that our computers and media devices can be connected to a router on board instead of relying on wifi, which isn’t always good at the other end of the boat from our mifi.

A look through samples for furnishings, I’ve managed to eliminate quite a few, but the main fabric for the dinette isn’t quite what I hoped it would be, so some more samples are needed before we can make our final decision. Who knows they all might still change dependant on the dinette.

Hello!

Yesterday we made the trip up to Sheffield to catch up with the build. NB Oleanna was sitting out in the yard with a 2 part epoxy blacking and then a primer coat to protect her from the elements. The shell is finished with all the little twiddly bits. Inside has been painted too to stop any rust and the next stage is for her to be painted, wooden battens added to the interior and then spray foamed.

It is maybe easiest to talk through the photos.

 Looking from the bow. the rubbing strakes follow round the curve of the bow. The base plate has been cut away to shape around the shape of the hull. Rings are visible where the bow fender will be attached.

There are no front doors as these will be made of hard wood and glazed.

The few scratches on the paint work of the bow are from the hull being moved around the yard on fork lifts and will be touched up.

Side view of the bow. You can see how the bow curves upwards. There is a silver coloured sacrificial anode towards the bottom of the hull. There are four of these in all. 2 either side of the bow and two either side of the stern. Next to the anode is the grill at the end of the bow thruster tube. This is to stop objects from being pulled into the propeller inside the tube and fowling the thruster.

This shows the top of the bow and the lid of the gas locker. These are the only fake rivets on Oleanna. The T stud is where the bow line will attach for mooring.

Below here there is space for two 13kg bottles of LPG which we will use to cook with and we will possibly have a gas central heating boiler too.

The cratch board will sit to the furthest right of the photograph, supported by a cross member to the roof of the boat, this will then have a cratch cover attached, covering the well deck.

Curves and mouldings to the steel work add extra interest. The moulding on the right gives water the chance to run off the roof at these points.

On either side of the well deck there is a locker with metal hinged lid. The ends nearest the bow doors have been scalloped so that the doors can open up fully. The hole seen at the bottom of the scallop is so that if water gets into the well deck it can drain back out into the canal. To the left in this photo you can just see the lid of the bowthruster locker. This will give access down to the motors etc, however the battery will be located in one of the side lockers.
This is looking from inside back through the bow door opening. You can see that the floor and it’s cross members have been sprayed black and that the hull sides have been sprayed grey for protection against rust. The cross members will have wooden battens added to them. Between the cross members on the floor is where the ballast will be positioned. The cabin sides will be sprayed with insulating foam stopping the chance of condensation on the inside of the hull.

The next few photos show the inside of the cabin, first looking back to the stern, then the bow. Holes in the ceiling are for the mushroom vents which help prevent us from suffocating when all the doors are closed. You can make out the inside of the stern doors, these are steel, but will be lined with wood.

Around the porthole closest to the bow extra uprights have been welded to the cabin side. These must be so that there are secure fixing points for the cupboards that will be in here.

The pipes coming out from the side of the cabin are for drains from appliances.

The furthest forward is for the washing machine which will be at Mick’s side of the bed, then the shower followed by the bathroom sink. These are all positioned above water level outside, otherwise they would let water in and we’d sink. The shower will require a gulper/pump to suck the water up and over the side.

Looking at the stern doors. Below them is what looks a bit like a letter box. However this will actually be a vent into the galley from the engine bay, this gives enough ventilation without having to have vents in your back doors. The rear cabin steps will sit here centrally.
The pipe coming through the rear bulk head is for cables, water pipes etc. There is a matching one on the other side too.

The low box/cheese wedge is the swim of the hull, this takes up quite a bit of space at the rear of the cabin and stops you from being able to use these areas for appliances.

Three of these are on the exterior gunnel sides and where you can attach fenders. However from past experience we would be very unlikely to attach them here. The temptation to cruise with your fenders down is too great and lifting them a bit of a phaff. This is also the most likely reason that we have over the last couple of years gained several fenders, around our prop, that have been lost by other boats in locks when their fenders were down.  We are more likely to attach fenders to the grab rail by using wooden hooks. These you can position where you need them and then just lift them out of the way completely. So why still have these? They will be very useful when we moor as we could use them to tie additional lines creating what are known as springs.  Having two lines going in opposite directions from the bow and stern mean that you are less likely to move in strong winds or when speeding boaters pass.

View down the starboard side, another boat in the way.

The port side showing the side hatch that will be opposite our dinette, window in the centre of photo will be the galley. The grill on the side of the boat is for ventilation into the engine.

Below the stern you can see the point where the swim has a hole for the prop shaft to come from inside, this will be where the propeller sits. Behind this is the rudder which pivots in a cup that is attached to the swim.

Above on the stern deck is the weed hatch. This on Tyler Wilson hulls is separate to the engine bay totally, so there is no risk of sinking your boat by not tightening the weed hatch up properly. The grooves on either side let water drain off the back deck. Our current boat doesn’t have these and water drains around the opening to the engine into a channel before being diverted off the boat. 
A loop is visible that the back fender will attach to. Also one of the two rear dollies is visible. This is where you tie your stern line to when mooring. The one in view also acts as ventilation to the diesel tank, having a hole in the top. This will have mesh fitted at some point. 
This is our all important Hull number. This is attached near the weed hatch and is unique to Nb Oleanna. It states who built her, in what year and what number boat she is from that builder. This number will be on our contract.
Finally a view across the stern to the stern doors. There are back doors to the semi trad stern. The hole in the metal work on the left is where the throttle control will be. There is then a locker running full length to the back doors, as there also is on the right hand side out of view in the photograph. On the rear bulk head to the left of the doors is a lockable panel. This is where all the gauges to do with the engine will be and the ignition. Our current boat has this and Mick likes being able to see the dials from the helm, quite often they are just inside the rear doors and not that visible.
The large hole in the floor is the engine bay and you can see the letter box ventilation into the main cabin. 
The back doors will only open to just gone 90 degrees, this was to give us more locker storage space at the rear. The sliding hatch is above these.
After having a good look around our hull we then sat down with Ricky, Louis, Julia and Ken and talked through the contract and stage payments. Then in much more detail we talked through engine, wiring, alternators, travel power, the interior allsorts. We still have to make our minds up about various things. Weighing up the pros and cons versus price on various elements to do with the fit out. Wooden window liners or metal, which bow thruster etc. A lot of things still to sort.
But the most important one is what colour we are going for with the exterior paintwork. This is the next job and paint needs ordering. Sadly the colour we would really like doesn’t seem to have a RAL or BS number, we have a choice between two blues. Despite having a RAL chart to look at this still isn’t the exact colour. So we have been given a little bit of time to think it over and see if we can get a reference to the colour we would really like. But as they use 2 part epoxy paint we may not get an exact match as this may only be available in an oil based paint which is not quite so resilient.
We came away with homework to do and awaiting more details on various things. A very exciting day, we have a boat!

On the move

Today we’ve had three more photos from Tim of NB Oleanna being put onto a low loader to travel to Sheffield. The hull will be finished off and then all the fit out will begin.

Cabin sides and roof welded in place

The cabin sides and the roof have been welded into position. The rear rubbing strakes welded around the stern. The piece of box section across the back opening is what in the theatre world we’d call a travelling batten. As we are having a semi trad stern there will be no roof on this last section of cabin sides, so the batten is there to keep the structure in position as it is lifted onto the low loader.

Two fork lifts position NB Oleanna onto the lorry.
The shell lifted into the air whilst the lorry backs in under it.
Here you can see that the grab rail has been formed and sits higher than the curved roof. The front bulk head will be added in Sheffield along with the bow rubbing strakes. It is interesting that the full sheet of the base plate is still attached and has not been cut away. I am assuming this is for extra strength whilst she is moved around and across the country. The diagonals that you can see inside the cabin are also kept on for support and to keep the structure square until the front bulk head is welded into position.
On 23rd March she made the journey across the Pennines to Sheffield to Jonathan’s yard where we hope to see her soon.

Up to the gunnels

Tim Tyler forwarded some more photos this morning of NB Oleanna up to the gunnels.

The stern

The rounded  section is the stern most of which you can see when a boat is in the water, Below where it comes to a point is called the swim. At the point is where the drive shaft comes through from the engine and turns the propeller. The two skimpy legs are just there to support the overhanging stern during construction. On the top edge there is a notch which is there to drain rainwater from the stern. On our current boat we don’t have one of these, rainwater has to drain down into a trough around the edge of the engine bay.

Engine Bay

This is a view looking from the other side of the stern. Nearest the camera is one end of the engine bay. Forward of this is the interior of the boat. At the bottom is the engine mount. To the right of this is the skin tank, this is used like a radiator in a car to cool the engine, the water itself is cooled as the tank is on the swim of the boat under the surface of the canal water.

The flat area is where things like the calorifier (hot water tank) and batteries will be positioned. The flat upright (we think) is the front face of the fuel tank. This tank will go to the rear of the stern around the weedhatch. On Tyler Wilson boats access to the weedhatch is not through the engine bay, as it is on may boats, but it is kept seperate. This means that if you don’t secure the lid to the weedhatch properly then you won’t flood your boat when the prop gets going. The weedhatch gives you access to the propellor so that if anything has fouled on it (carpets, plastic bags, coats, rope, occasionally weeds) you can clear it.
There is a tube right at the rear of the stern, this is where the rudder post will go down through the stern and attach to the rudder.
Looking towards the bow

The sides of the hull are made up from two lengths of steel, you can see the weld line which is paler than the sides and stiffeners. An extra stiffener has been added to give more strength where the two sheets meet. The diagonals are used to hold the sides in position whilst they are welded to the base plate. They also help the hull keep it’s shape and strength until the cabin is fitted above.

The inside shape of the bow can be seen with the sides curving in along with the baseplate curving up.
The bow

Here you can clearly see how the bow baseplate curves upwards. The shaping of the bow has been spot welded into position.

Looking back towards the stern

This shows the stiffeners and diagonals well.

Along with receiving these photos today, we have had conversations with Julia regarding the shape of the front lockers. As we are having a Trad bow our bow thruster will be positioned under the well deck, so access to it will be through the floor of the deck. The battery will be housed in one of the lockers.
The positions of the windows needed to be confirmed before the apertures could be cut. We have my original drawings and I hadn’t written the dimensions between the windows on the plans. So this morning I spent sometime measuring the original drawings, double checking and emailing the details to Julia. Jonathan does have copies of the plans, but as they have been scanned and printed out they may have been distorted in the process. Their positions have had a lot of consideration with relation to built in furniture, so an approximation wouldn’t look right. So best measure twice and cut once.